
FileZillaの設定方法
FTPソフトFileZillaを使ってエックスサーバーへ接続する際のFileZillaの設定方法をご紹介します。
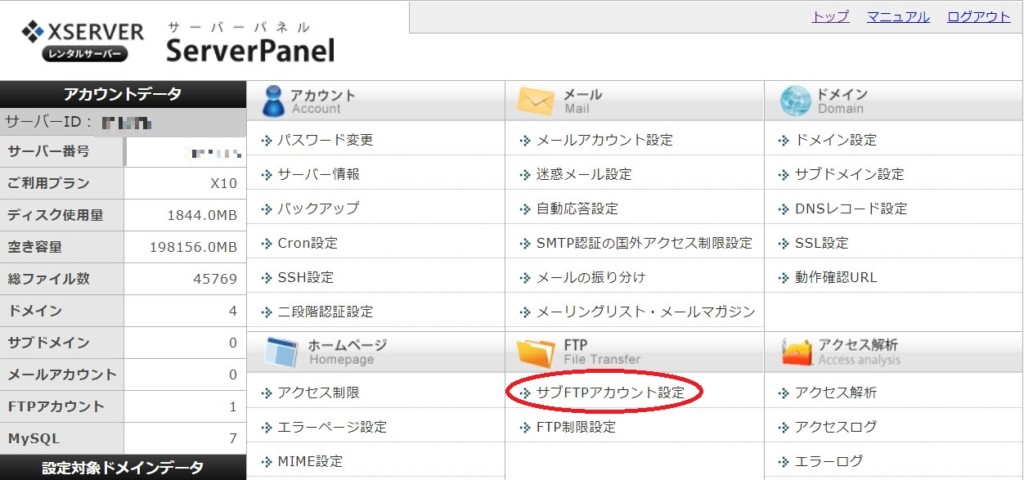
エックスサーバーのFTP設定内容確認
サーバーパネルにログインして[サブFTPアカウント設定]をクリックします。
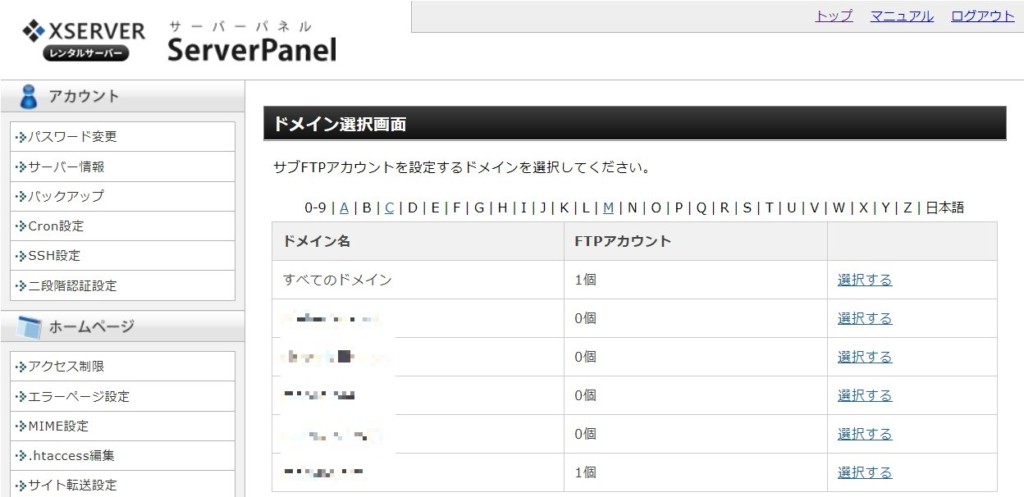
ドメイン選択画面で接続したいドメインの[選択する]をクリックします。
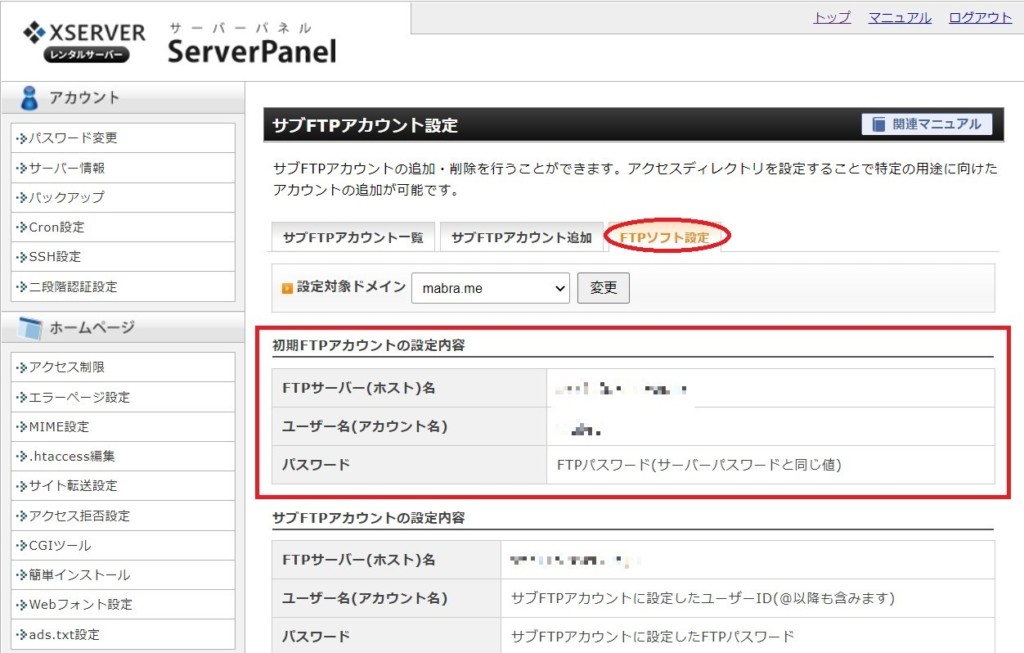
 [FTPソフト設定]のタグを選択すると、FTPアカウントの設定内容が表示されます。この情報は後程FileZillaの設定で入力しますので、このまま開いておきます。
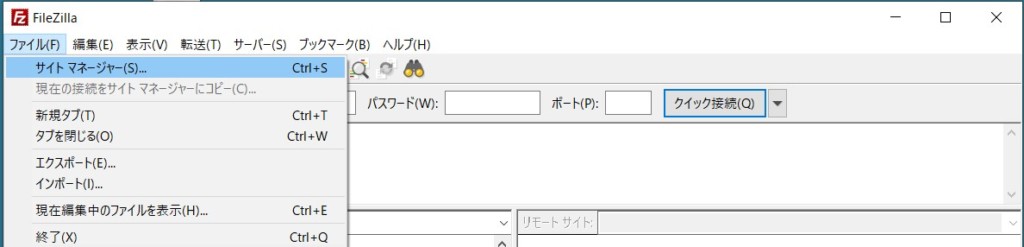
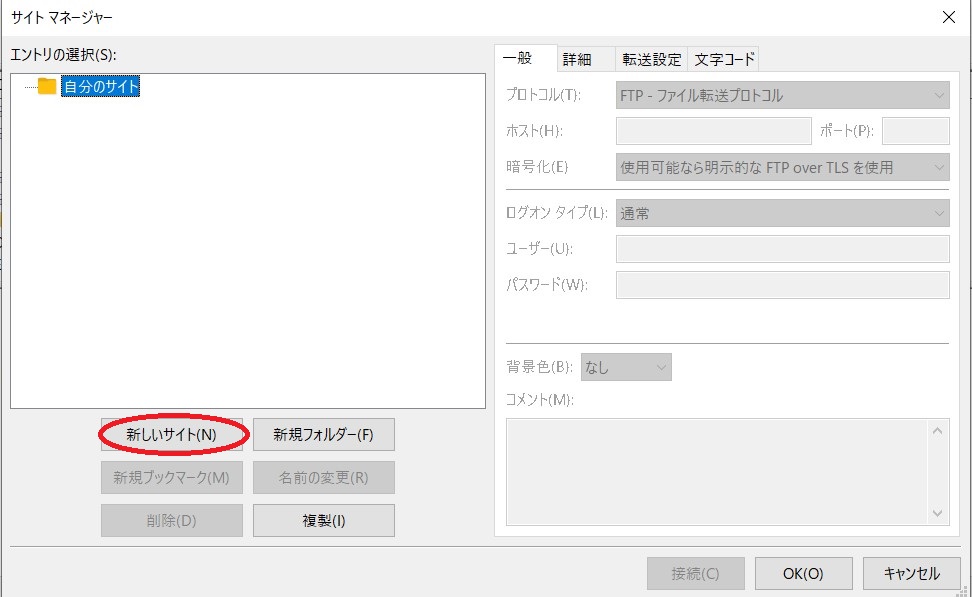
サイトマネージャーを開く
FileZillaを開き、[ファイル]から[サイトマネージャー]を選択します。
 [新しいサイト]をクリックします。
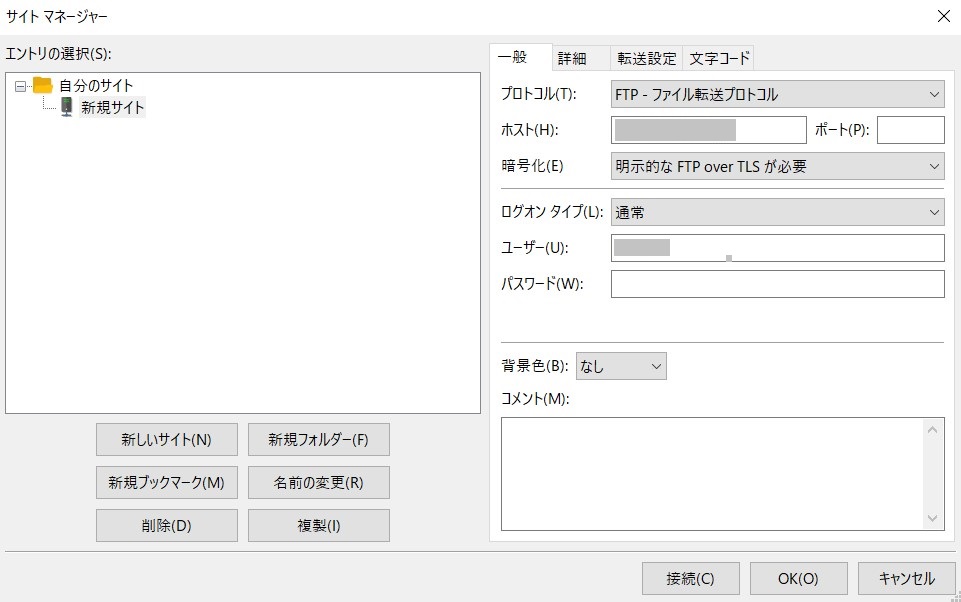
各項目を選択及び入力する
■プロトコル:「FTP – ファイル転送プロトコル」を選択
■ホスト(H):サーバーパネルで確認した「FTPサーバー(ホスト)名」を入力
■暗号化:「明示的な FTP over TLS が必要」を選択
■ログオンの種類:「通常」を選択
■ユーザー(U):サーバーパネルで確認した「ユーザー名(アカウント名)」を入力
■パスワード(W):FTPパスワードを入力
入力後、[接続]ボタンをクリックします。
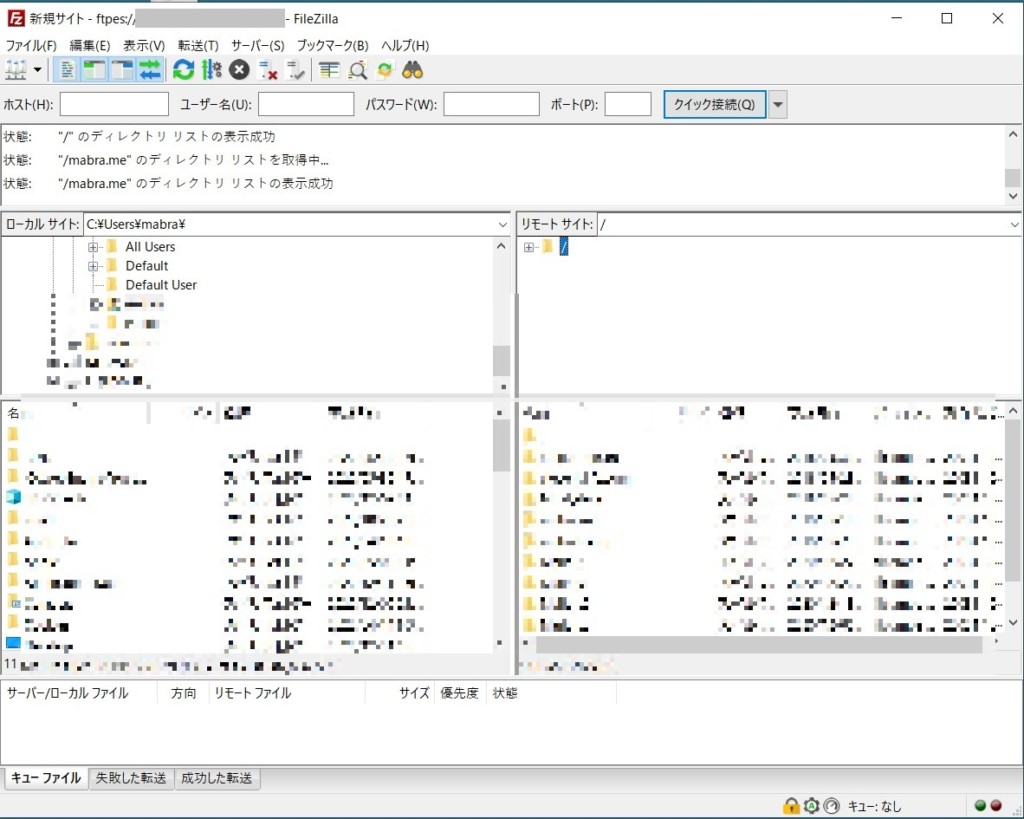
エックスサーバーへ接続されました。
以上です。
この情報がお役に立てば幸いです。最後までご覧いただき、ありがとうございました。


コメントを残す